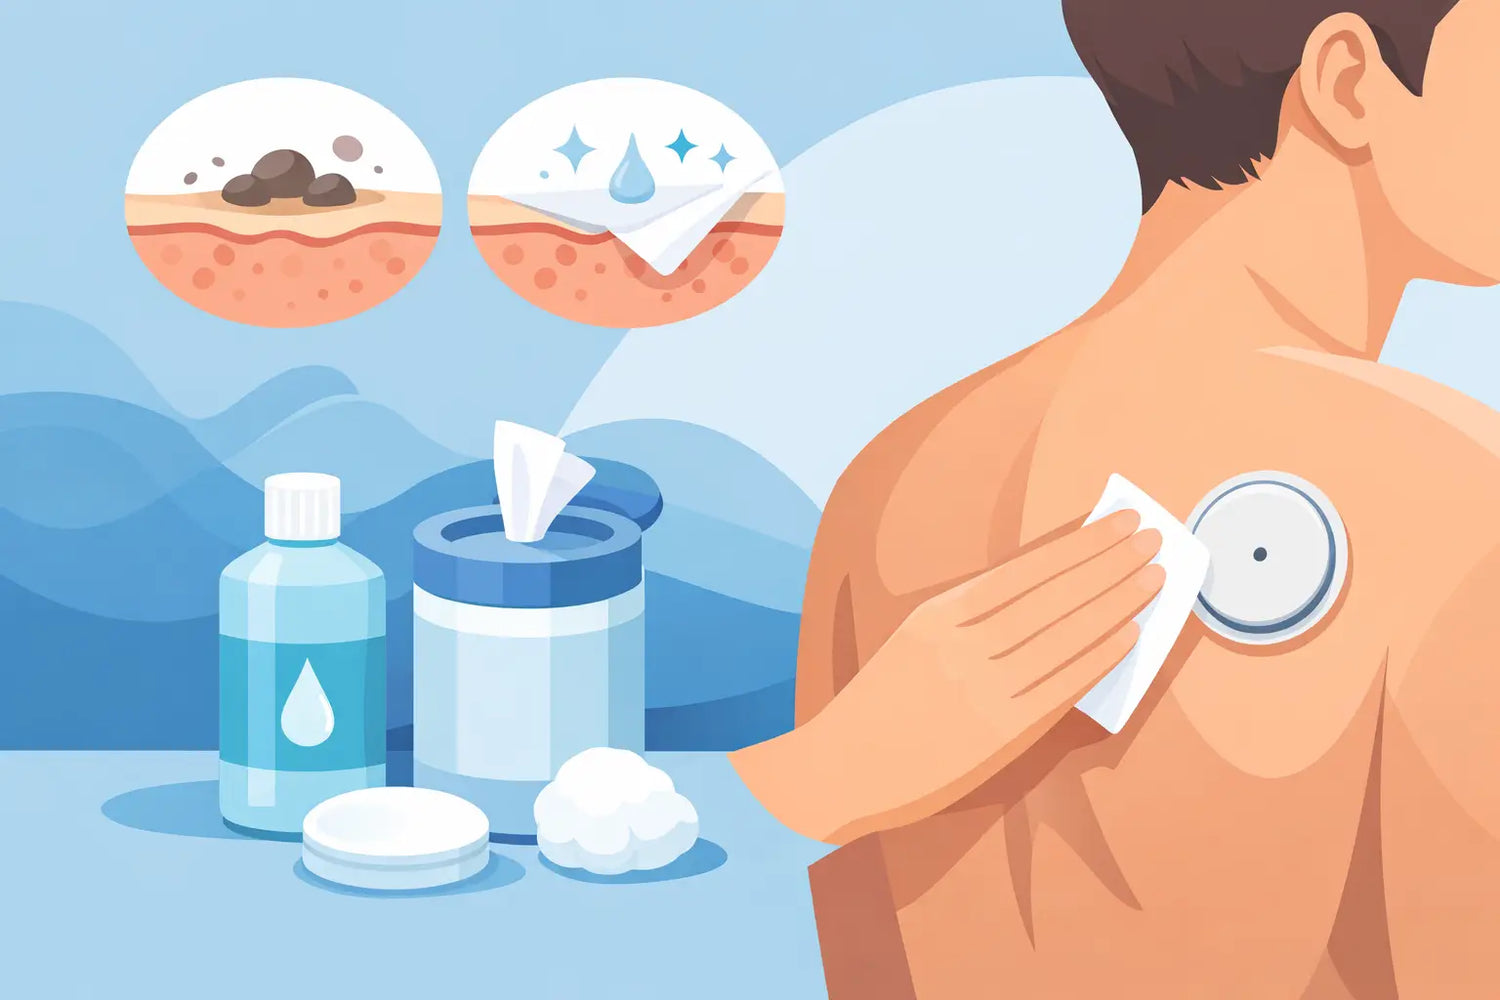
A sensor that lifts early usually does not fail because of the sensor. More often, the problem starts with what is left on the skin - lotion, sweat, sunscreen, soap residue, or even a quick prep routine that never fully dries. If you are wondering how to clean skin before sensor placement, the goal is simple: create a dry, residue-free surface without irritating the skin you need to wear that sensor on for days.
For CGM and pod users, this matters every cycle. A good prep routine can improve adhesion, reduce edge lift, and make the wear period more predictable. It does not need to be complicated, but it does need to be consistent.
Why skin prep affects sensor performance
Adhesives are engineered to bond to clean, dry skin. That bond gets weaker when the surface has oils, dead skin buildup, moisture, or leftover product sitting on it. Even products that seem harmless, like body wash with moisturizers or a light layer of lotion applied earlier in the day, can interfere with adhesion.
Skin prep also affects comfort. Over-cleaning or using harsh products can dry the skin out and increase the chance of redness, itching, or sensitivity under the adhesive. So the right approach is not aggressive scrubbing. It is controlled prep with the minimum amount of product needed to get the skin ready.
This is especially relevant if you wear a Libre, Dexcom, or Omnipod on a repeat schedule. Small mistakes repeated every 10 to 14 days add up. A better routine protects both adhesion and skin integrity over time.
How to clean skin before sensor application
The best method depends a little on your skin type, your activity level, and whether you have had adhesion trouble before. But the baseline routine is straightforward.
Start by choosing a site with intact skin. Avoid areas with cuts, active irritation, rash, peeling skin, or leftover adhesive damage from the last wear cycle. If the area looks inflamed, give it time and rotate to a different approved location.
Wash the site with plain soap and water if needed, especially if you have visible sweat, dirt, sunscreen, or body oil on the skin. The key word here is plain. Heavy moisturizers, oil-based cleansers, and fragranced body washes can leave residue behind. If you wash the area, rinse thoroughly and dry it completely with a clean towel.
After that, clean the site with an alcohol wipe or another sensor-safe skin prep product, depending on your skin needs. This removes surface oils and helps create a cleaner bonding surface. Use a single pass or two, not repeated rubbing until the skin feels raw. Then let the area air dry fully.
That last step matters more than people think. Applying a sensor to damp skin weakens the bond from the start. If the wipe feels cool on the skin, it is probably still evaporating. Wait until the area is fully dry before placing the sensor.
What to avoid before placement
A lot of adhesion issues come from products used hours before insertion, not just minutes before. Lotion is one of the biggest problems. If you moisturize after a shower, keep it away from your planned sensor site. Sunscreen, body oil, and ointments can cause the same issue.
Fresh shaving can also be a problem. If you need to remove hair, trim or shave carefully and give the skin time to settle. Shaving immediately before placement may create micro-irritation, and that can make adhesive wear less comfortable. For some people, shaving the night before works better than shaving right before insertion.
Do not use exfoliating acids, retinoids, or harsh acne products on a planned sensor site. These can weaken the skin barrier and increase sensitivity under adhesive. If you are prone to irritation, simpler is better.
If you sweat a lot, your routine may need one extra step
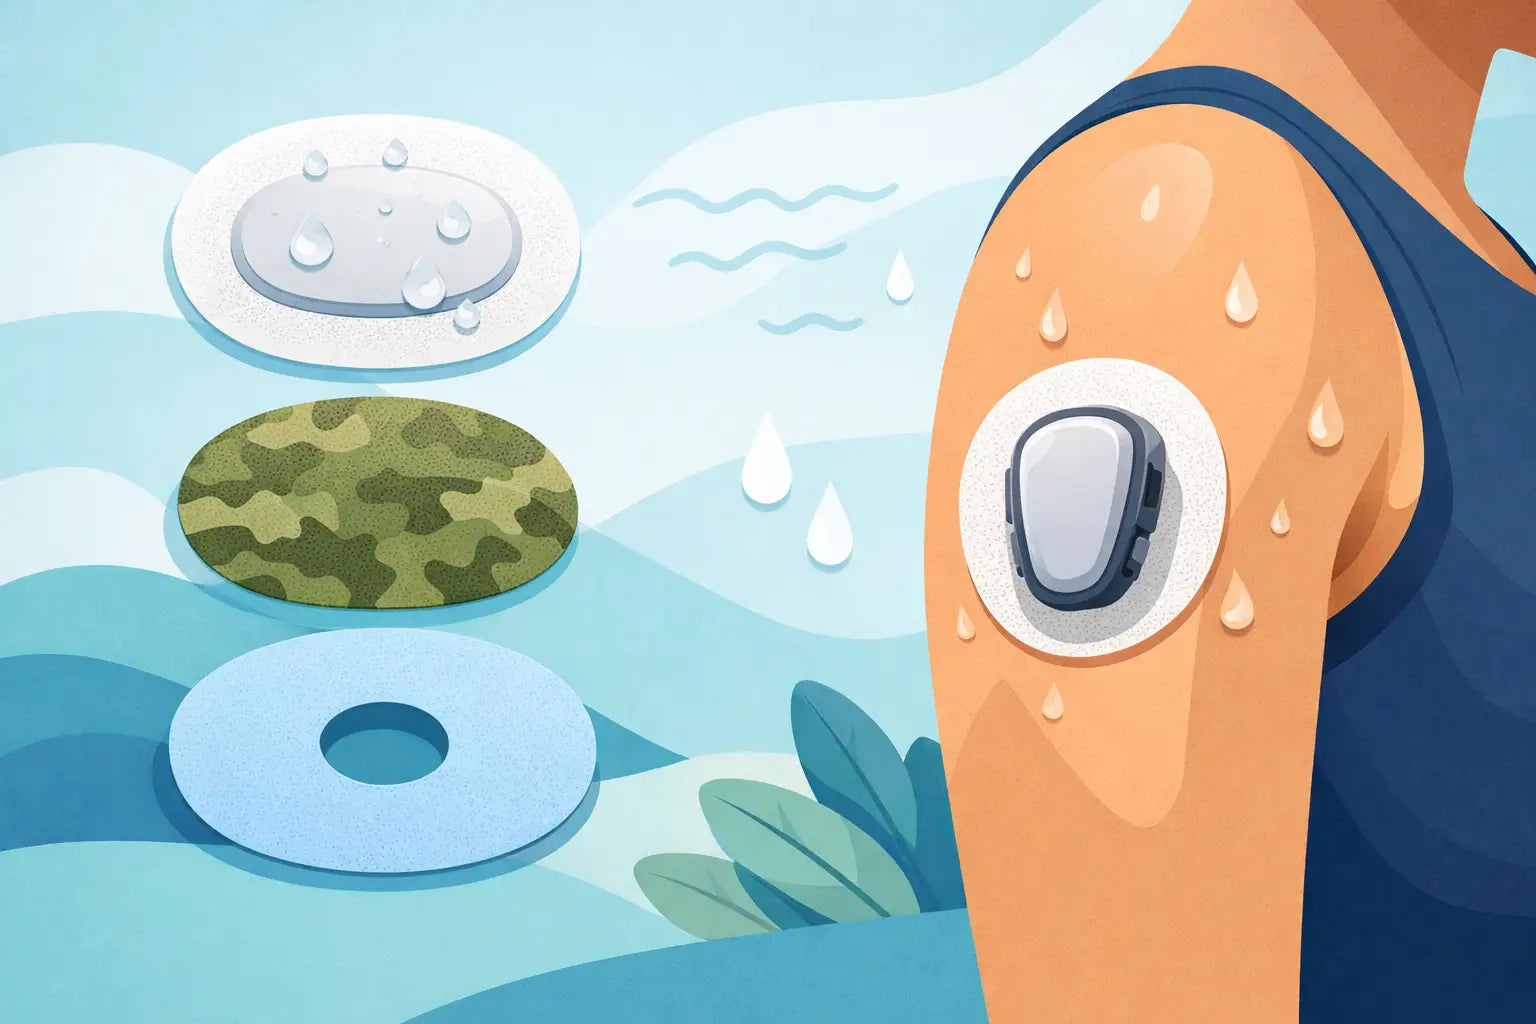
Some users do everything right and still deal with early edge lift because their skin runs oily or they sweat heavily. In that case, basic cleaning may not be enough on its own.
First, make sure the skin is cool and dry before insertion. If you are placing a sensor after a workout, after being outside in heat, or right after a shower, wait. Skin that looks dry can still be warm and producing moisture. Give it a few extra minutes in a climate-controlled room.
Second, you may do better with an alcohol-free skin prep barrier designed for adhesion support, especially if standard alcohol wipes leave your skin dry or reactive. The trade-off is that prep barriers need to be compatible with your device adhesive and your skin. Too much product can work against you. A thin, fully dried layer is usually the right approach.
For users who need more security, an overpatch can add reinforcement after insertion, but it should never replace proper cleaning. A patch performs best when the sensor adhesive underneath starts with a clean foundation.
How to clean skin before sensor wear if you have sensitive skin
Sensitive skin changes the equation slightly. You still need clean, dry skin, but you want to reduce unnecessary friction and avoid products that sting or strip the skin barrier.
If alcohol tends to burn or cause redness, use a gentler skin-safe cleansing option approved for adhesive prep. Fragrance-free and alcohol-free products are often better tolerated. Let the product dry completely, and do not layer multiple prep solutions unless your clinician has advised a specific protocol.
It also helps to watch your removal routine, not just your placement routine. Skin that is repeatedly pulled, scrubbed, or stripped of adhesive residue can become more reactive with each cycle. If your site is getting more sensitive over time, the issue may be cumulative, not sudden.
For repeat wearers, consistency beats intensity. A disciplined, low-irritation routine usually works better than constantly switching products when the skin is already stressed.
Hair, residue, and site rotation
Hair can interfere with adhesion, but the fix should be controlled. Dense hair under a sensor or patch can create gaps, reduce contact, and make removal more painful. If trimming is enough, that is often the least irritating option. If shaving is necessary, use a clean razor, shave gently, and avoid placing the sensor on skin that is actively irritated.
Residue from your last patch or device also matters. If adhesive residue remains on the skin, remove it fully before your next wear cycle. Leftover tacky spots can trap lint, oils, and product buildup. They also make it harder to judge whether the new site is actually clean.
Rotation is part of skin prep, even if it does not look like cleaning. Reusing the same spot too soon increases the risk of irritation, poor adhesion, and discomfort. Healthy skin is a better surface. Give frequently used areas time to recover.
Common mistakes that shorten wear time
The most common mistake is rushing. People clean the skin, place the sensor too soon, and then wonder why the adhesive edges start lifting by day two or three. Dry time is not optional.
Another mistake is touching the cleaned site with your fingers before insertion. Even clean hands transfer oils. Once the area is prepped, leave it alone.
Using too many products is another issue. Soap, alcohol, barrier film, adhesive enhancer, and lotion somewhere near the site can create an unpredictable surface. If your current routine works, keep it simple. If it does not, adjust one variable at a time so you can tell what helped.
Temperature also plays a role. Very humid bathrooms and post-shower application can reduce early adhesive performance. A clean, dry room is a better setting for placement than a steamy one.
A practical routine you can repeat every cycle
If you want a reliable answer to how to clean skin before sensor placement, use a routine you can realistically repeat every time. Choose a healthy site, wash with plain soap and water if needed, dry the skin fully, wipe away oils with a skin-safe prep product, and wait until the skin is completely dry before insertion. Then place the device without touching the prepped area.
That routine is simple because it is supposed to be. Good adhesion usually comes from disciplined basics, not complicated hacks. Brands like OHMRX focus on this same idea - skin-safe, routine-friendly tools that support daily wear without shortcuts or gimmicks.
The best prep routine is the one that protects your skin and helps your device stay where it belongs, cycle after cycle.
Leave a comment
This site is protected by hCaptcha and the hCaptcha Privacy Policy and Terms of Service apply.