
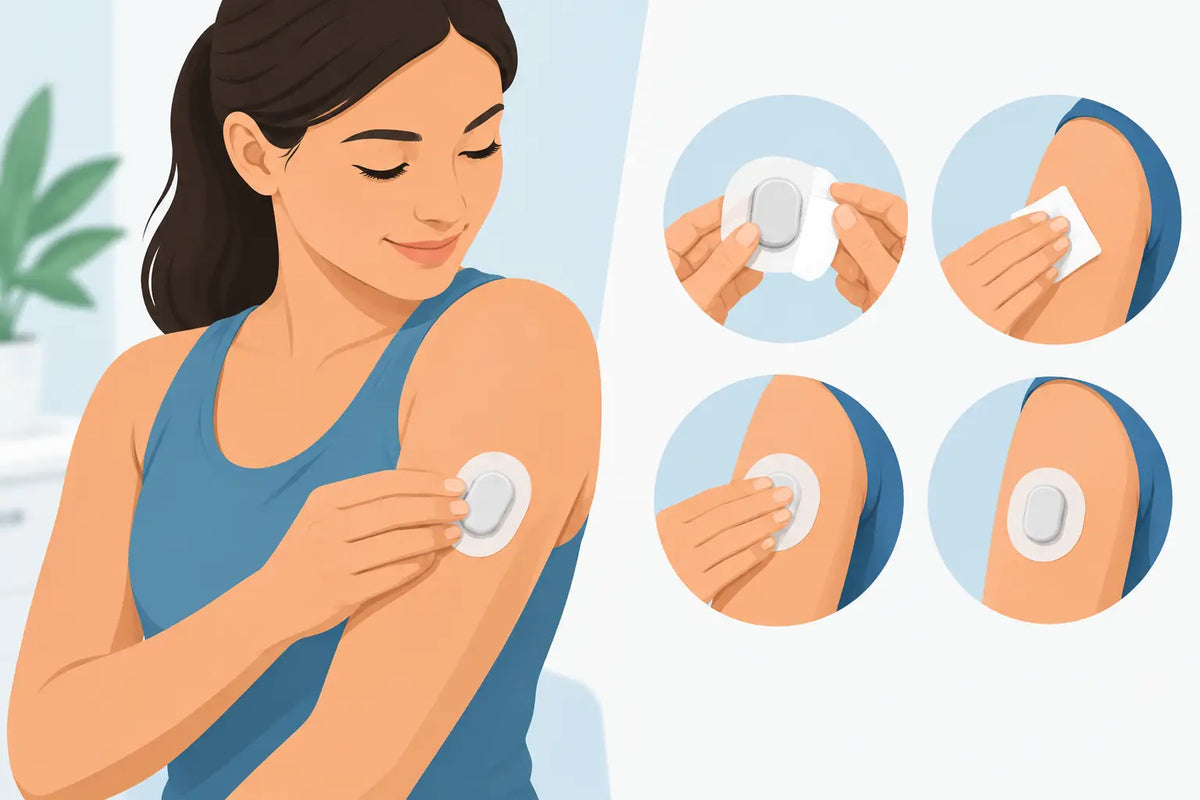
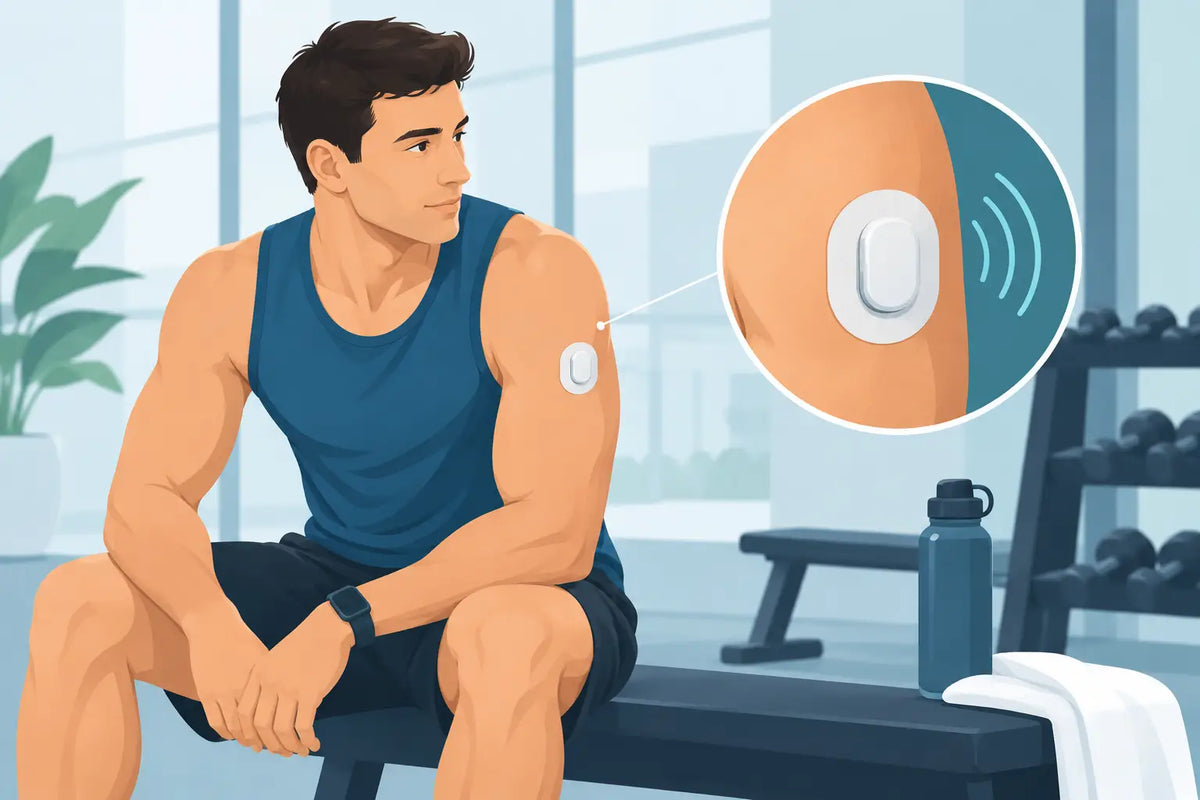
A Dexcom G7 sensor is small, but the conditions around it are not. Sweat, showering, clothing friction, workouts, heat, and everyday movement can all challenge the sensor’s adhesive over a 10-day wear cycle. When you apply Dexcom G7 patch support correctly, the goal is simple: reinforce the sensor without creating wrinkles, pulling on the device, or irritating your skin.
A well-applied overlay patch should feel like part of your routine, not another thing to manage. The difference usually comes down to skin prep, placement, and giving the adhesive a fair chance to set before your day gets moving.
Before You Apply a Dexcom G7 Patch
Start with the sensor itself. Insert your Dexcom G7 according to Dexcom’s current instructions, using an approved site and allowing the sensor adhesive to settle against clean, dry skin. An overlay patch is designed to support the existing adhesive, not replace proper sensor application.
Choose a time when your skin is cool and dry. Applying an adhesive patch immediately after a hot shower, intense workout, or time outdoors in humid weather can trap moisture beneath the edges. That moisture may weaken adhesion early, even if the patch initially looks smooth.
The application area should be free from lotion, body oil, sunscreen, and residue from previous adhesives. Wash the area with mild soap and water if needed, then dry it completely. If you use a skin-prep wipe, follow its directions and wait until the skin feels fully dry before applying anything. For people who need additional support, an alcohol-free skin prep option may be more comfortable than harsher cleansing products, but compatibility and individual skin tolerance still matter.
Hair can also affect how long a patch stays put. You do not need to shave a large area, but closely trimming hair at the application site can help the adhesive make direct contact with skin and make removal less uncomfortable later.
How to Apply a Dexcom G7 Patch Without Wrinkles
Apply the overlay patch after your sensor is secure and the surrounding skin is dry. Sit down or stand in a relaxed position that keeps the skin around the sensor relatively flat. Stretching your arm, twisting your torso, or flexing the area during application can cause the patch to bunch once you return to normal movement.
Before removing the backing, hold the patch over the sensor to check its orientation. The center opening should sit around the Dexcom G7 without covering, lifting, or pressing down on the sensor. Take a moment here. Rushing this step is how a patch ends up off-center with an exposed edge that catches on clothing.
Remove part of the backing first. Center the opening around the sensor, then press one section of adhesive onto the surrounding skin. Gradually remove the rest of the backing while smoothing the patch outward from the center. Use the pads of your fingers rather than your nails, which can snag or puncture the material.
Once the patch is in place, press around the full border for 20 to 30 seconds. Gentle, even pressure helps activate the adhesive and reduces the chance of early edge lift. Do not pull the patch tight as you apply it. A stretched patch can recoil over time, creating tension at the edges and making it more likely to peel.
Check the Sensor After Application
A correctly placed patch should lie flat around the sensor with no major folds, tension lines, or gaps. The sensor should remain undisturbed and comfortable. If you notice that the overlay has shifted the sensor, is pressing against it, or has trapped a deep wrinkle near the adhesive border, it is better to address the issue immediately than wait for it to worsen.
Follow Dexcom’s guidance for your device and do not use an overlay patch to force a loose or failing sensor back into place. If the sensor adhesive has significantly lifted or the sensor appears unstable, contact Dexcom for device-specific support.
Give the Adhesive Time to Set
The first hour after application matters. If possible, avoid swimming, showering, heavy sweating, and high-friction activity during that window. The patch does not need to be treated delicately for the entire wear period, but its adhesive benefits from a dry start.
Waterproof patch material is useful for real life, including showers, workouts, rain, and routine hand-washing. Still, waterproof does not mean immune to every condition. Long periods in hot water, frequent sauna use, aggressive towel drying, and rubbing from tight waistbands or straps can wear down even a high-quality adhesive.
After bathing or swimming, pat the area dry rather than rubbing it with a towel. If an edge begins to lift slightly, press it down with clean, dry fingers. Avoid adding random tapes, glues, or household adhesives over the patch. They can create skin irritation, leave difficult residue, or interfere with comfortable removal.
Common Reasons Dexcom G7 Patches Lift Early
Most early lifting is not a product failure. It is usually a condition problem: moisture, skin oil, friction, tension, or placement on an area that moves more than expected.
A patch may lift sooner if it was applied over damp skin, after lotion or sunscreen, or before a workout. The same can happen when the patch is stretched during application. Even a small amount of tension can pull the edge upward as the body moves through the day.
Location also matters. Dexcom-approved sensor sites should always guide placement, but within that approved area, consider your personal friction points. Think about where a backpack strap, bra strap, sleeve seam, seat belt, or sleeping position repeatedly contacts the sensor. The best site is not necessarily the one with the least motion. It is the one that balances Dexcom’s instructions, your skin comfort, and your day-to-day routine.
If your skin tends to be oily, if you exercise frequently, or if you live in a hot climate, a consistent prep routine becomes even more valuable. Repeatable steps reduce guesswork each time you start a new sensor cycle.
Skin-Conscious Use Matters as Much as Hold
Strong adhesion should not come at the cost of angry skin. Redness that fades quickly after removal can happen with many adhesives, but ongoing itching, burning, blistering, broken skin, or a spreading rash deserves attention. Remove the patch if you experience a significant reaction and speak with a healthcare professional or dermatologist about options that fit your needs.
Avoid applying a new patch over irritated, damaged, or recently healed skin. Rotate sites according to device instructions and give frequently used areas time to recover. Some people benefit from keeping brief notes on which sites hold best and which ones create sensitivity. Over several sensor cycles, that record can make placement more predictable.
Removal deserves the same care as application. Peel the patch back slowly, keeping it low and close to the skin rather than pulling upward. Warm water and an adhesive-removal product can help with stubborn residue. Go slowly, especially if your skin is sensitive or the patch has held firmly for the full 10 days.
Build a Reliable 10-Day Routine
The most effective approach is usually the least complicated one: clean skin, full drying time, relaxed placement, firm pressure, and a short settling period before water or exercise. Keeping your prep items together makes that routine easier to repeat when each sensor cycle ends.
OHMRX patches are designed for that real-world rhythm, with waterproof support and skin-conscious materials intended to help Dexcom users move through work, workouts, sleep, and daily care with fewer adhesive worries.
A patch should support confidence, not demand attention. Apply it with care at the start of the cycle, check the edges after high-friction activities, and let a consistent routine do the rest.


Leave a comment
This site is protected by hCaptcha and the hCaptcha Privacy Policy and Terms of Service apply.